Self-Hosted build Agent for Azure Pipelines
Welcome to our guide to installing the Azure Agent In this post, we'll cover the installation process, whether you're setting up a self-hosted agent for Azure Pipelines.

What is Azure DevOps?
Azure DevOps is an integrated service provided by Azure. As a SaaS offering, it lacks a pre-installed host, or more precisely, an agent to carry out its operations. Consequently, to utilize our Azure DevOps Pipeline effectively, we must ensure an agent is set up within our Agent Pool. In this blog, we will learn how to configure an agent and later on how to create a service for our host.
What is an Azure Agent?
Azure Agent is software that allows you to build code or deploy software using Azure Pipelines. It serves as a bridge between your infrastructure and Azure services, ensuring a seamless automation process.
There are two main types of agents:
- Microsoft Managed Agents: These are managed by Microsoft and require no configuration on your part.
- Self-hosted agents: These are configured and managed on your own infrastructure, giving you more control over your build environment. After you've installed the agent on your machine, you can install any other software on that machine as required by your build or deployment jobs.
Configuring a self-hosted Agent might seem complicated but by following the below steps we can easily configure an agent in our Agent Pool.
So, let's move step by step
Step 1: Creating Agent Pool
- Sign in to Microsoft Azure
- Log in to your development project in DevOps (
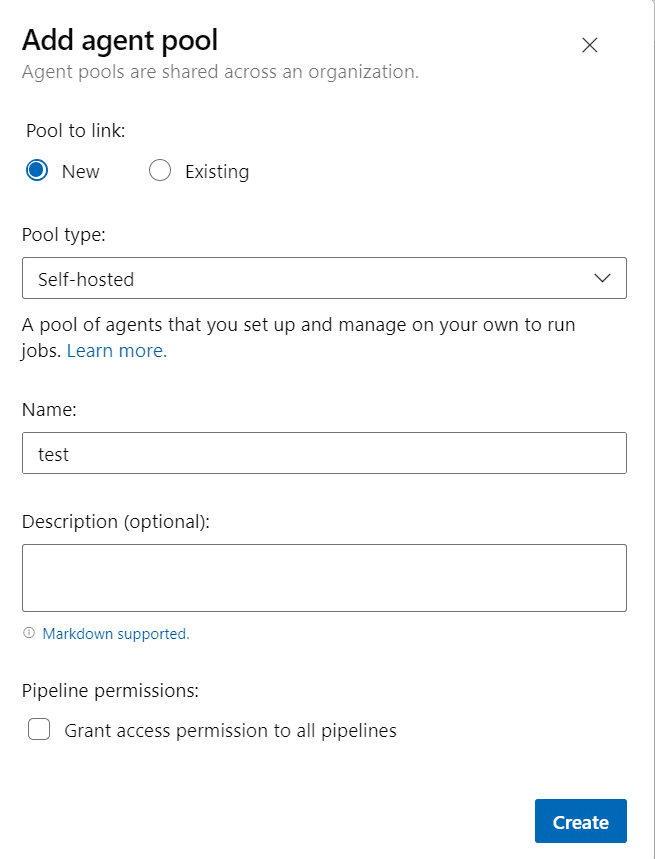
https://dev.azure.com/<your project name>). - Go to Project Settings -> Pipelines -> Agent Pools and click New Agent Pool.
- Choose self-hosted Agent
- Enter the agent name and click Create

Step 2: Generate Personal Access Token (PAT)
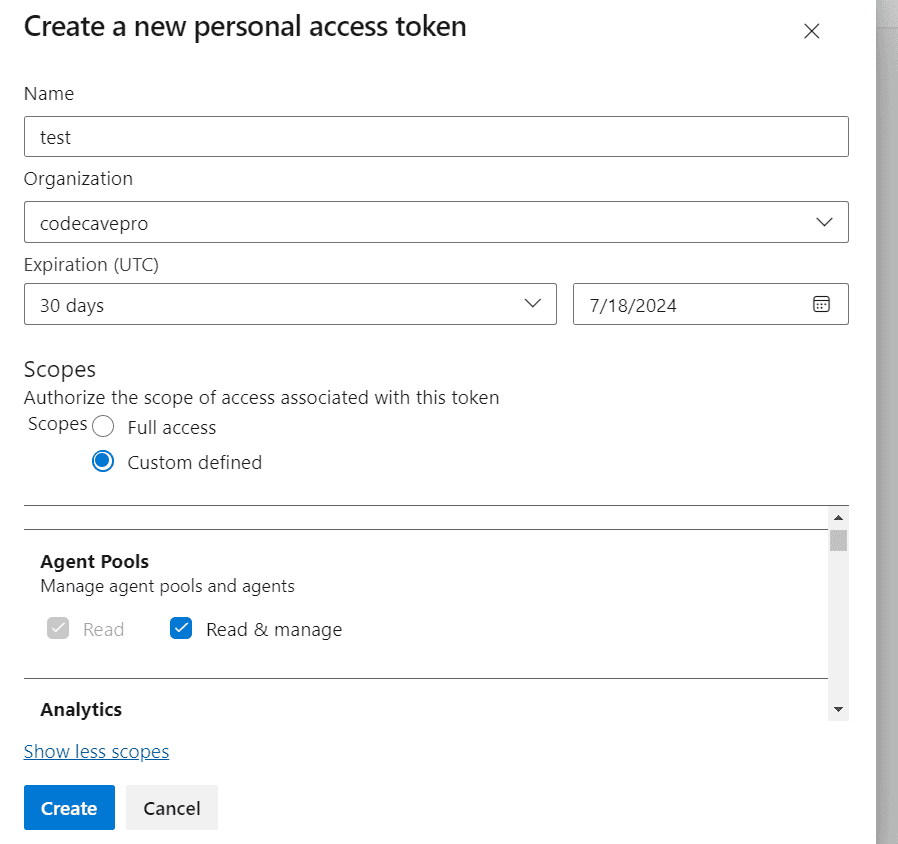
You need to go to the Personal Access Tokens section under User Settings located in the top right corner of your screen. Name it accordingly and grant permissions as per your requirements.


If you have any questions, try following the instructions in this link - PAT key.
Step 3: Check prerequisites
Before you begin the installation process, please ensure that your system meets the requirements; links to official documentation are provided below.
When it comes to safety, here are the basic principles:
- Secure agent folders as they contain sensitive information.
- Use the least required permissions for agent functionality.
Step 4: Get The Agent
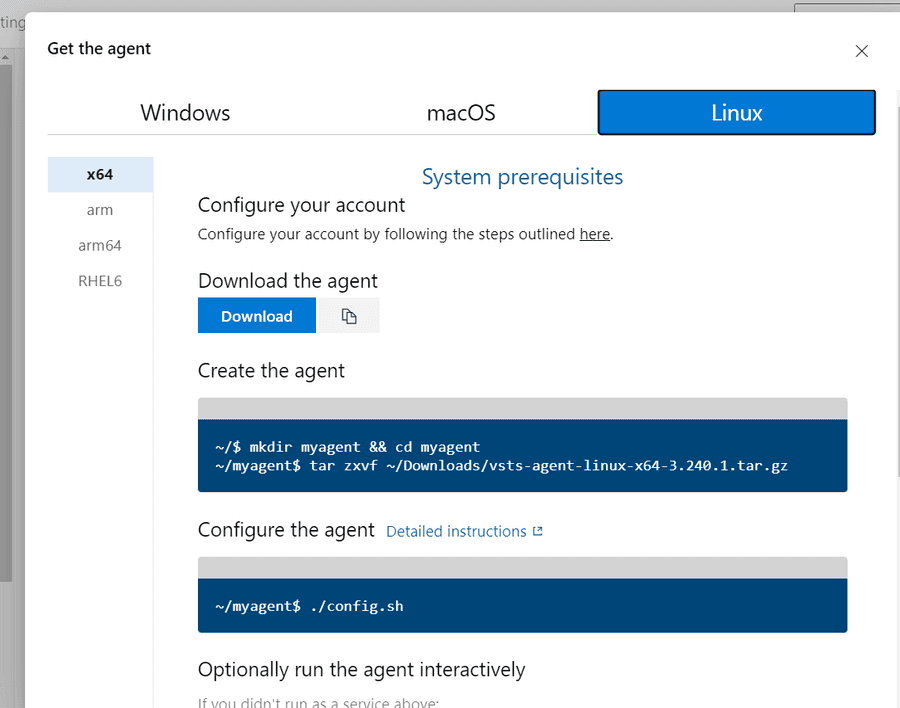
Once the agent pool is created and PAT is generated, select the pool and click New Agent. In the new pop-up window, choose the operating system which you need and move forward accordingly.

Step 5: Configure Agent
We'll look at the Linux configuration as a guide; with other operating systems the steps will be similar.
Once you've clicked "Download" or copied the URL, you'll need to log into your virtual machine.
Create an agent folder and navigate to it using the following command:
mkdir myagent && cd myagentDownload the agent using the following command in case of Linux:
wget https://vstsagentpackage.azureedge.net/agent/3.240.1/vsts-agent-linux-x64-3.240.1.tar.gzUnzip the contents using the following command:
tar zxvf ./vsts-agent-linux-x64-3.240.1.tar.gzAfter extracting the contents, configure the agent using the command:
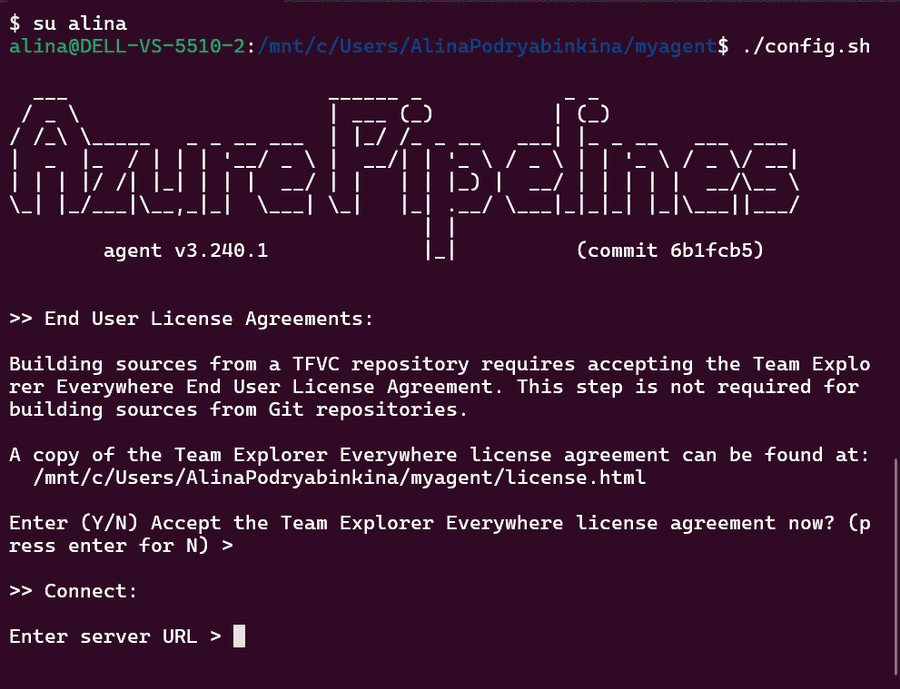
./config.sh
Provide the server URL: (https://dev.azure.com/<your project name>), PAT key and the agent pool name you created earlier, agent name and work folder.
Once the agent is configured, it will show as below under your agent pool in Azure DevOps with red mark - Offline.
You can run the agent interactively using this script:
./run.shit will bring your agent from Offline to Online.
Once ./run.sh ends, our agent will go offline again and will not be available for deployments until we run it again.
To eliminate unnecessary routine steps and have an agent that is always listening, we will configure it as a service.
We can create a service using this script in your agent folder:
./svc.sh install && ./svc.sh startOr create a service configuration file
sudo nano /etc/systemd/system/agent.servicePaste the following content into the file:
[Unit]
Description=Azure-devops-agent-ubuntu service

[Service]
User=<your username>
ExecStart=/path/to/your/agent/run.sh
Restart=always

[Install]
WantedBy=multi-user.target
Replace <your username> and /path/to/your/agent/run.sh with your details.
After saving the file, activate and start the service:
sudo systemctl daemon-reload
sudo systemctl enable agent.service
sudo systemctl start agent.service
sudo systemctl status agent.service
The service for your Azure agent is now activated and will run continuously and will be available to take build tasks now!
Final Thoughts
Whether you are using Windows, Linux or MacOS, installing the Azure Agent is an important step in automating your build and deployment processes. By following detailed instructions for each operating system, you can ensure seamless and secure integration with Azure services.
We hope this detailed guide was helpful to you. If you have questions or need more help, please refer to the official Azure documentation.

